Updated Frame Design
It’s been a really, really long time since I’ve posted anything here. I’ve been extremely busy with school stuff and I haven’t had the time or motivation to keep things documented. Regardless, a lot of progress has been made since the beginning of 2016. The second version of my quadcopter frame saw its first flight and first crash, which led me to realize a few of the major issues with the design and cause me to get to work on a revision.
The Crash
It turns out the main reason for the crash was because the default PID values in Cleanflight are set really high and are meant for 250-sized quads. Too high of a P-gain caused oscillations which made the quad unstable, resulting in a flip and it flying straight into the ground. ALWAYS check your PID values before the maiden flight! If you’re building a quad larger than 250, it’s probably a good idea to lower those values by half or something. I found that it’s better to have low values and be under-tuned rather than be over-tuned and lose control.
The crash also revealed that the motor mounts were a weak point in the design. The el-cheapo mounts I bought off Amazon couldn’t handle the force of the motors when they hit the ground, and the mounting screws ripped right through the 1mm carbon fiber plate that the motors were mounted to. The wall thickness of the tubes was also a little on the thin side, as I was able to crack one tube when I tightened the motor mounts.
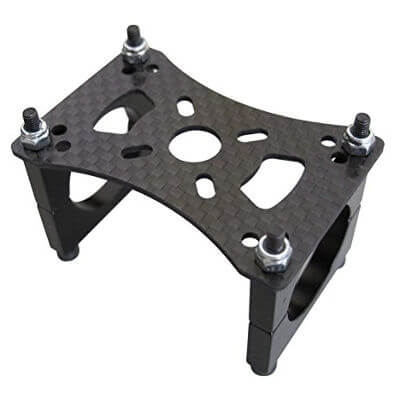
I was aware at this point that I needed to come up with a better way to attach the motors, and while I was at it, I should also address other minor issues that I discovered. The next revision of the frame needed stronger motor mounts, stronger tubes, improved rigidity of the center section, and reduced weight.
Power System Changes
A few days after the crash, I had temporarily repaired the motor mount and was eager to get out and attempt another flight. During some bench testing (without props, of course!) I noticed that one of the motors would not spin properly, and upon a closer look, I realized that one of my motors had shorted windings. I’m almost certain that the short was not caused by the motor mounting screws, and since the motors were essentially new, I assumed the failure was related to build quality. The Turnigy motors I had were fairly low quality and had a really stiff coggy feel when rotated. They were by no means known for efficiency or longevitiy.
Rather than buy a replacement motor, I elected to upgrade the power system with new motors and props. After a decent amount of time in eCalc and looking at motor reviews, I decided on something that was a big step up from what I had: the T-Motor MT2208-18 1100kv. While roughly the same size and kv, these motors are known for quality, are significantly more efficient, and had a lower weight. I am extremely impressed by the build quality and they have a nice smooth feel when rotated by hand.
After selecting a motor, I went with APC 8x4.5 props which are one inch smaller than what I previously had. With a 350 sized frame, now my quad should be able to fit in its case with the props on. I was able to cross reference the prop selection table provided by T-Motor with what eCalc said, so I am confident that I’ll have a system that gets good flight times while not sacrificing performance.
While I was at it, I also picked up counter-clockwise prop adapters for two of the motors as well as matching nylon locknuts.
Frame Design Changes
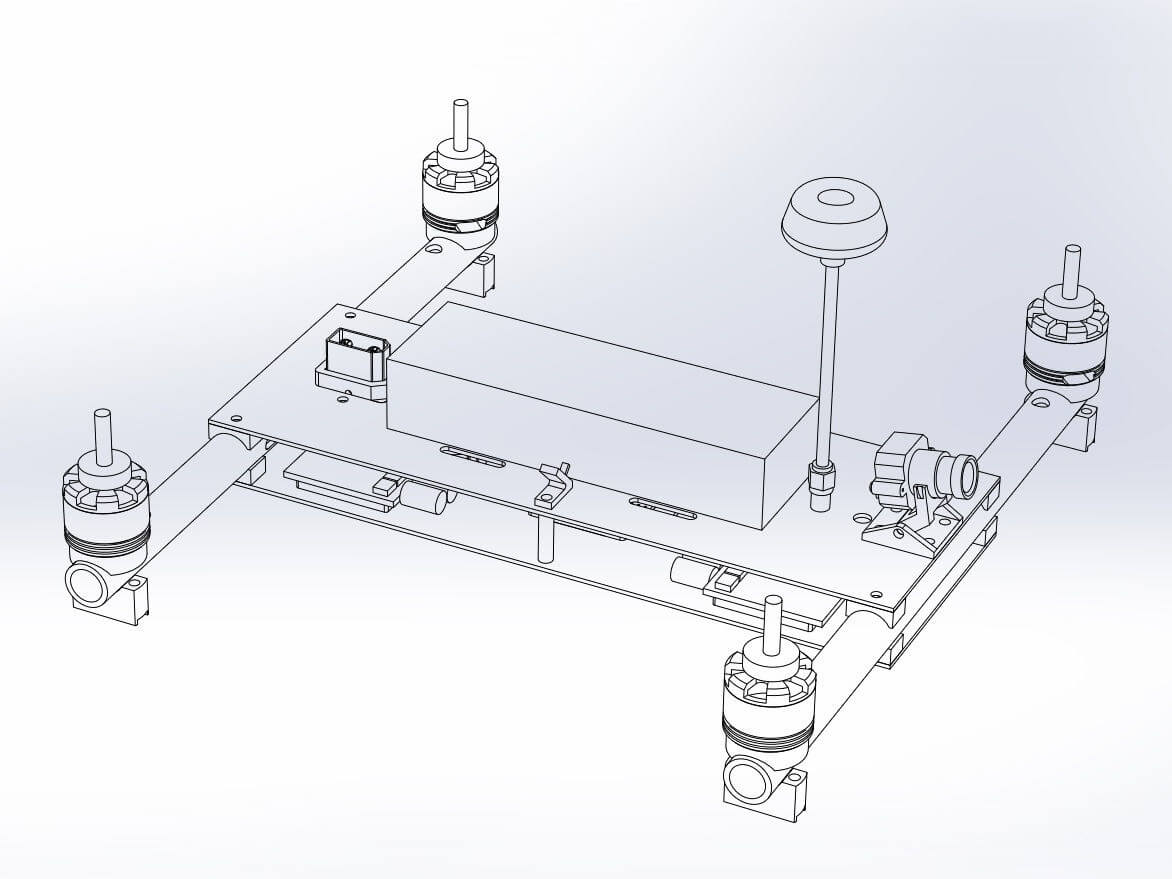
The two main goals for the updated frame were strength and weight reduction. I reduced the OD of the tubes from 25mm to 16mm and increased the wall thickness from 1mm to 2mm. The previous build had a big bundle of silicone wire to get power to the ESCs, so in order to save weight, I elected to replace the bottom carbon fiber plate with a power distribution board. This would allow me to clean up the wiring as well as add some cool features that I’ve seen on other PDBs, such as a current sensor. The old frame had vertical carbon fiber pieces that pressed into slots in the bottom and top plates, which made the frame a pain to assemble. I figured that they don’t provide enough value to justify their weight, so I got rid of them.
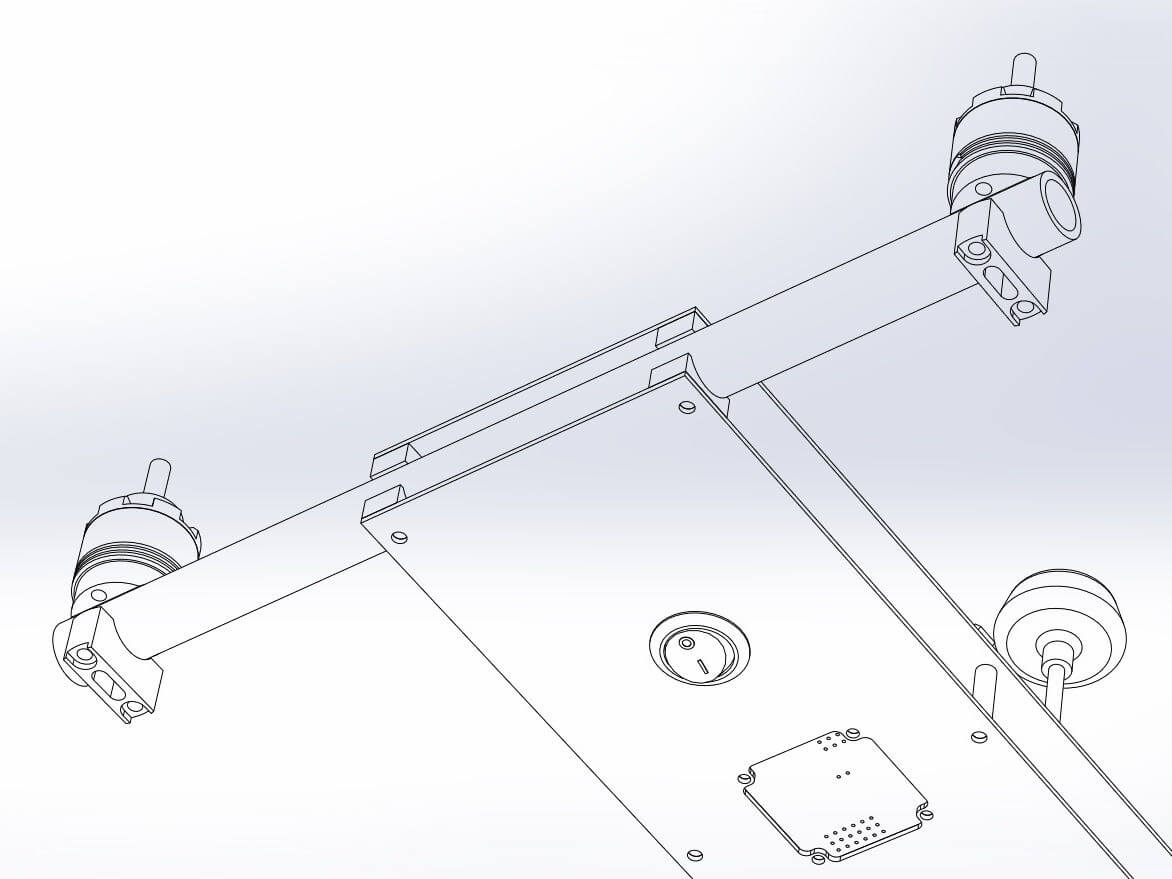
I also made a few other changes that made the design a little cleaner. I designed a motor mount that is no bigger than the motor itself and only includes hardware that screws directly into the base of the motor. Rather than hang an XT90 pigtail out the back of the quad, I designed a panel mount bracket so that the connector could be mounted directly to the top plate. This also gives me something to pull against which makes it easier to unplug the battery. I bought a short U.FL to SMA pigtail so that the FPV transmitter antenna could mount directly to the top plate.