Flashing ESCs with Simonk
As I have begun to learn more and more about this whole quadcopter thing, I’ve heard many people recommend replacing the stock firmware that comes with ESCs with a custom firmware, Simonk, that is specifically tuned for multicopters.
The SimonK firmware, named after the creator who is known as SimonK on the forums, provides smoother throttle response and should give better all around performance when used in a multicopter configuration. Supposedly it can also increase the refresh rate and has less bugs than the stock firmware.
So I decided to flash my four Turnigy Multistar 30 amp ESCs which are part of my quadcopter.
If you’ve ever used an Arduino before, flashing the firmware of an ESC isn’t much harder than loading a program. Most ESCs are powered by an AVR microcontroller, which makes it a walk in the park to upgrade the firmware. All you need to do is hook your ESC up to a programmer—which can be an AVR programmer, an Arduino, a Bus Pirate, etc.—and run avrdude to erase the chip and flash the new firmware.
Disclaimer: When flashing ESCs, there is the potential to ruin the ESC and turn in into a paperweight. Make sure that the version of SimonK being flashed has been verified as compatible with the specific ESC model, although there is no guarentee of functionality. Also note that the factory firmware on the ESC will be overwritten and unrecoverable.
Hooking It Up
To get started, I removed the green heat shrink to expose the board. Take care not to damage any of the components under the heat shrink when cutting the heat shrink.
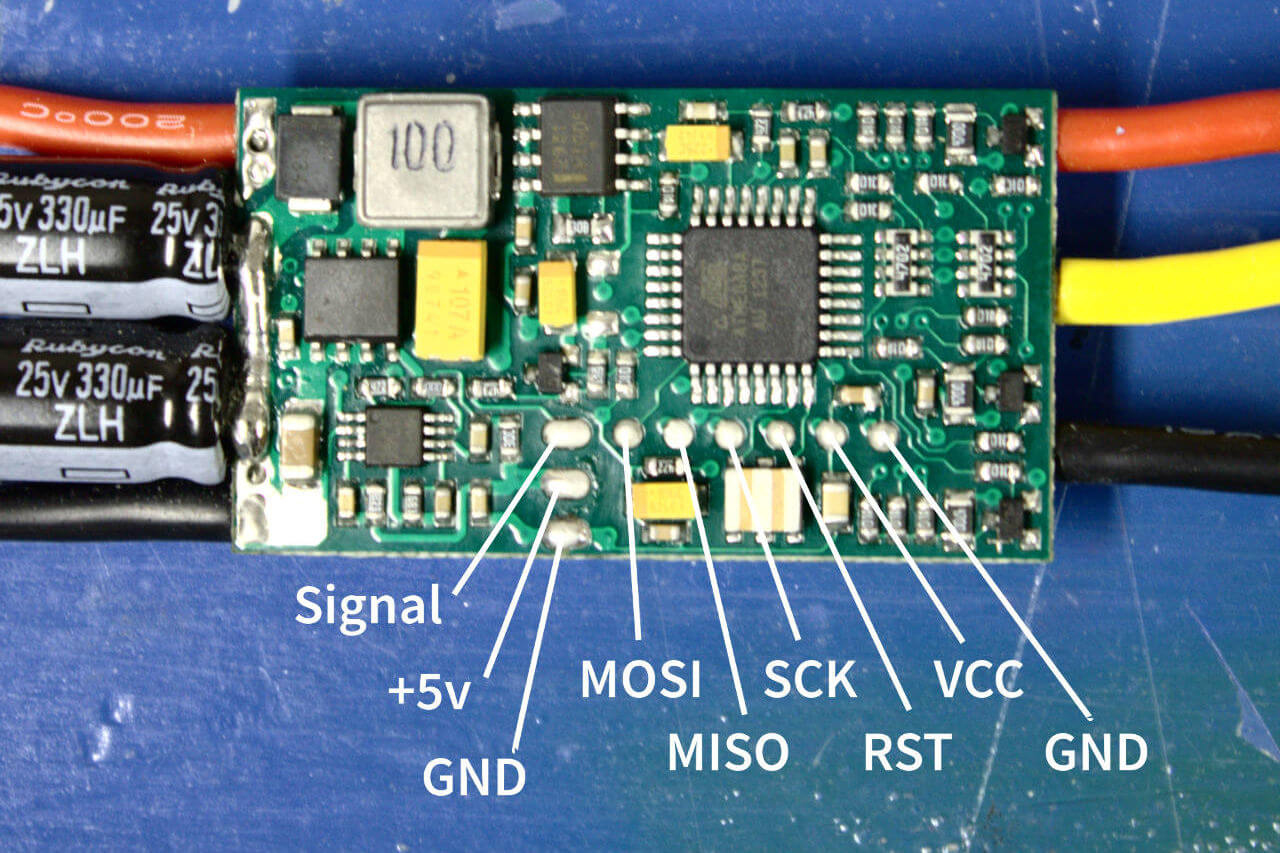
There are six pads for in system programming near the microcontroller near where the sigal wires connect to the board. In my case, I had to desolder those wires in order to get access to the pads.
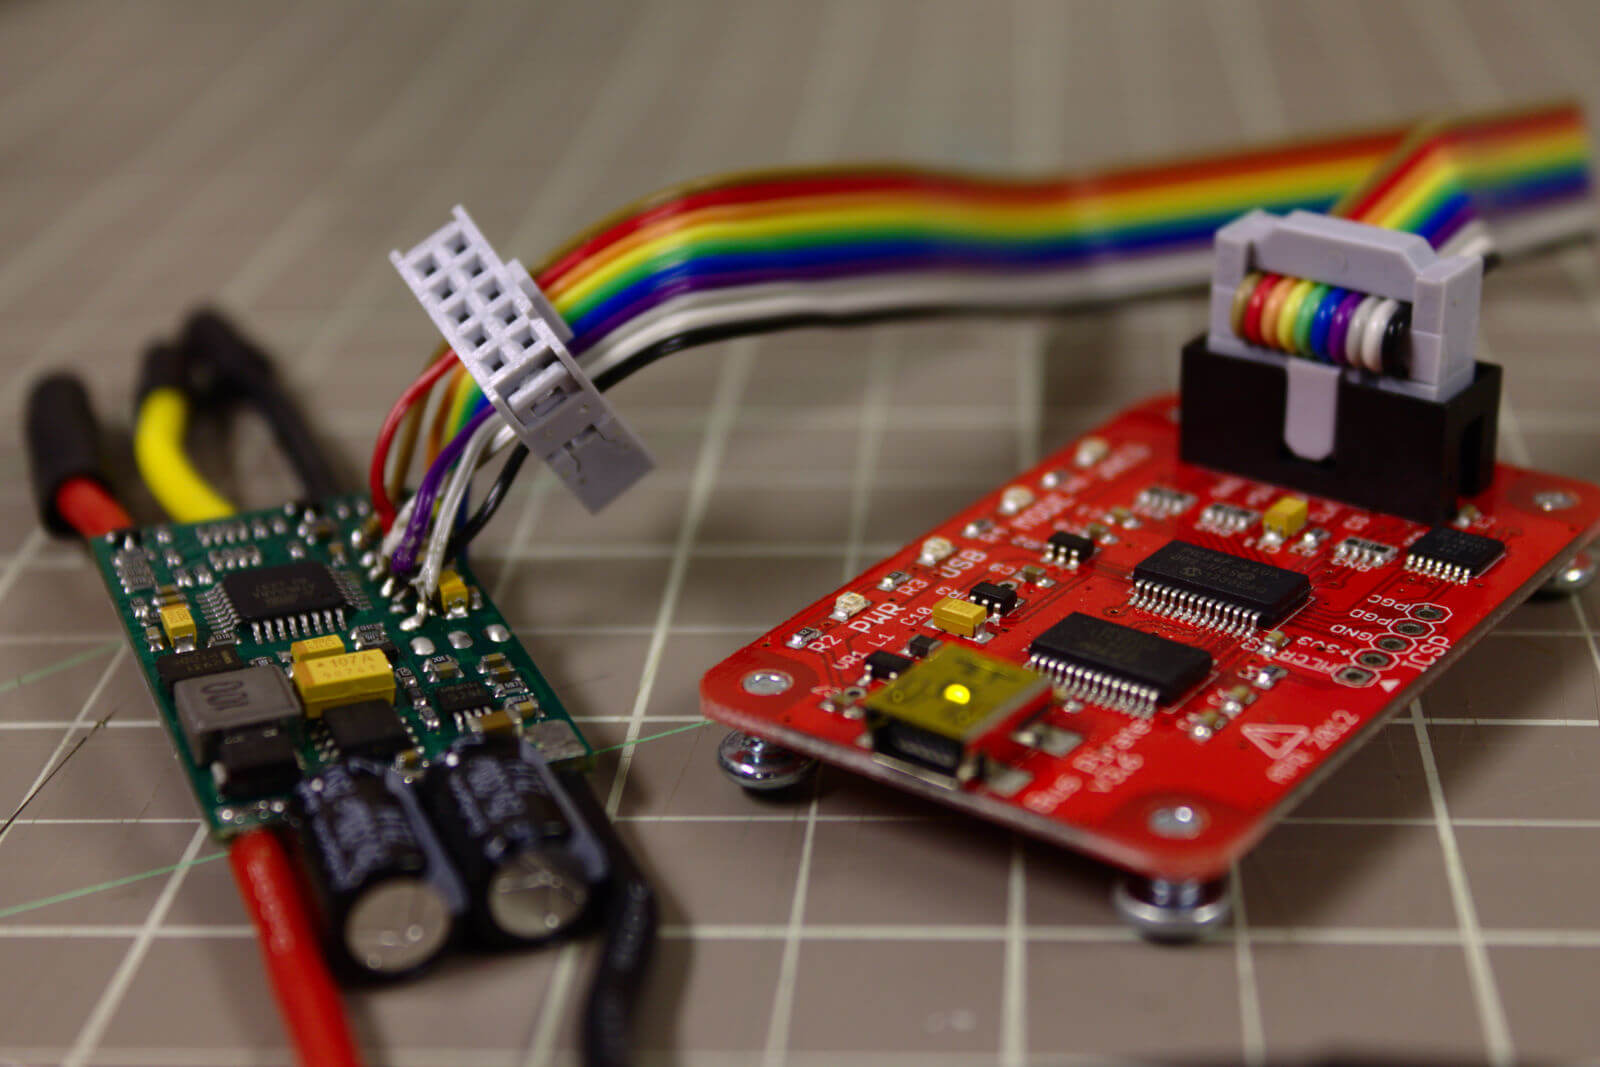
I’m using my Bus Pirate to flash the firmware. I had to remove one end of the ribbon cable and move it inward in order to be able to solder each wire to each individual pad. It can be a little tricky to solder those tiny wires and still maintain the correct order.
If you plan on flashing many ESCs, I might be a good idea to get a clothespin a make a programming mount to make it easier to switch between boards. I decided to solder the wires directly to the pads. With only four boards, it doesn’t take that much time.
For the Bus Pirate the connections are as follows:
- Bus Pirate MOSI → MOSI
- Bus Pirate MISO → MISO
- Bus Pirate CLK → SCK
- Bis Pirate CS → RST
- Bus Pirate 5v or 3v → VCC
- Bus Pirate GND → GND
The connections might be different depending on the programmer being used.
Flashing the Firmware
Once everything was ready to go, I had to figure out which version of Simonk would work with Turnigy Multistar ESCs. Based off of this forum post, it appears that the kda version is compatible with Turnigy Multistar ESCs up to 30 amps. I downloaded the latest version of Simonk, which include the hex files for each specific version.
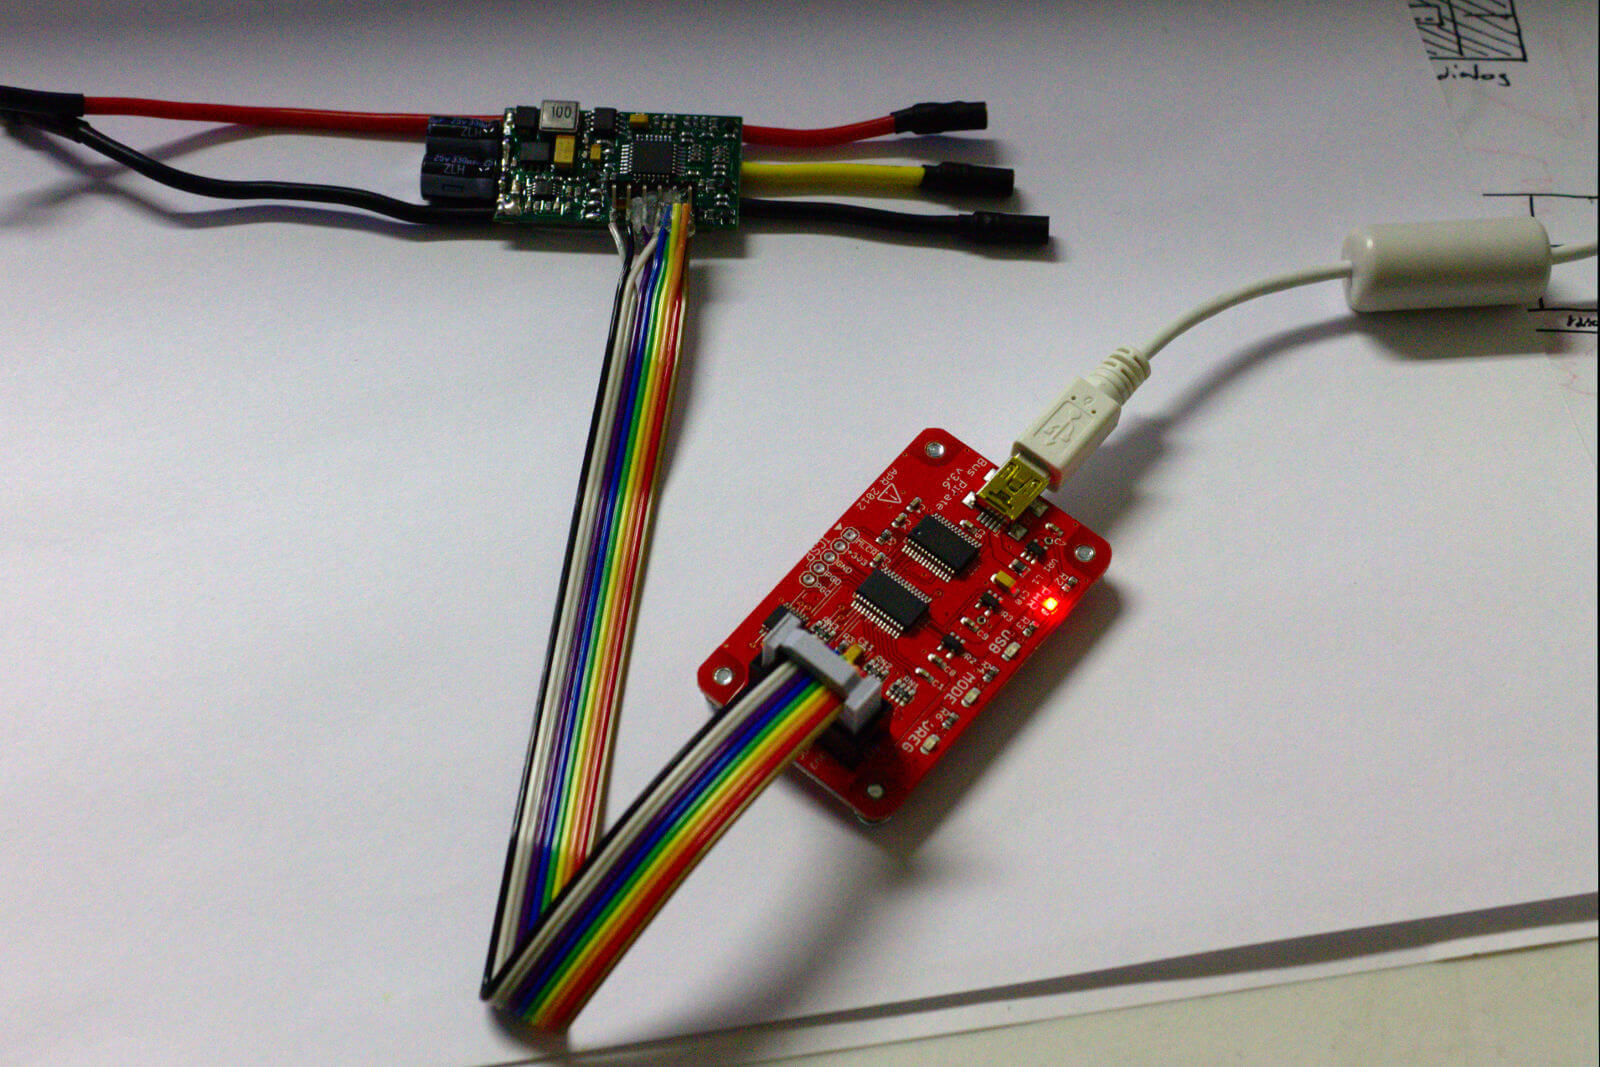
Now it’s time to use avrdude to actually do the flashing. I plugged in my Bus Pirate and opened a terminal.
If you haven’t installed avrdude, the easist way to get it is probably through installing the Arduino GUI. There are also a few avrdude packages available for major Linux distros.
As a precaution, I started by using avrdude to read the factory firmware from the ESC and write it to a file. In the event that something goes wrong, I should be able to use this to restore the factory firmware. Otherwise, it would be overwritten by SimonK and lost forever.
$ avrdude -c buspirate -P /dev/ttyUSB0 -p m8 -U flash:r:factory.hex
Make sure to set the appropriate options for avrdude, including programmer, chip type, and com port.
It’s time to flash Simonk. Make sure kda.hex is in the same directory as avrdude is being run.
$ avrdude -c buspirate -P /dev/ttyUSB0 -p m8 -U flash:w:kda.hex
Flashing the firmware should look something like this, where avrdude write the file and then reads it back to ensure that it was written correctly:
Attempting to initiate BusPirate binary mode...
avrdude: AVR device initialized and ready to accept instructions

Reading | ################################################## | 100% 0.01s

avrdude: Device signature = 0x1e9307
avrdude: NOTE: "flash" memory has been specified, an erase cycle will be performed
         To disable this feature, specify the -D option.
avrdude: erasing chip
avrdude: reading input file "kda.hex"
avrdude: input file kda.hex auto detected as Intel Hex
avrdude: writing flash (8192 bytes):

Writing | ################################################## | 100% 3.63s

avrdude: 8192 bytes of flash written
avrdude: verifying flash memory against kda.hex:
avrdude: load data flash data from input file kda.hex:
avrdude: input file kda.hex auto detected as Intel Hex
avrdude: input file kda.hex contains 8192 bytes
avrdude: reading on-chip flash data:

Reading | ################################################## | 100% 13.78s

avrdude: verifying ...
avrdude: 8192 bytes of flash verified

avrdude: safemode: Fuses OK (E:FF, H:C9, L:9F)

avrdude done.  Thank you.
If everything goes as planned, connect to the next ESC and repeat. Any errors that occur are probably a result of the wiring connection to the ESC, so check everything and try it again.
And that’s about it. See, it’s actually quite quick and easy.